
Ratings & Favorites Add-on
Ratings & Favorites have become powerful tools for improving the user experience because they enhance engagement and satisfaction.
The 'Ratings' feature is valuable because it provides you with feedback, helps users make informed decisions, and builds trust for your brand. In addition, 'Favorites' is loved for its personalization. It allows them to bookmark items with just a click, creating a personal collection of resources within your app. As a result, users engage more with the content and services they enjoy by providing quick access, personalization, and organization.
Below, we show you how to optimize your Devless app with the “Ratings & Favorites” add-on so your audience can use these popular features.
Getting Started
Devless makes implementing this add-on a breeze. Just follow the three steps below to enable it within your app!
- Login to Devless Admin.
- Click the Add-ons page in the left menu.
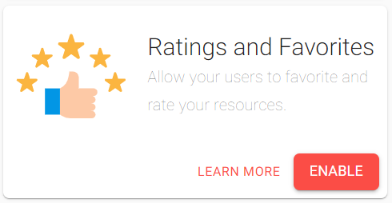
- Click the 'ENABLE' button for 'Ratings & Favorites.’
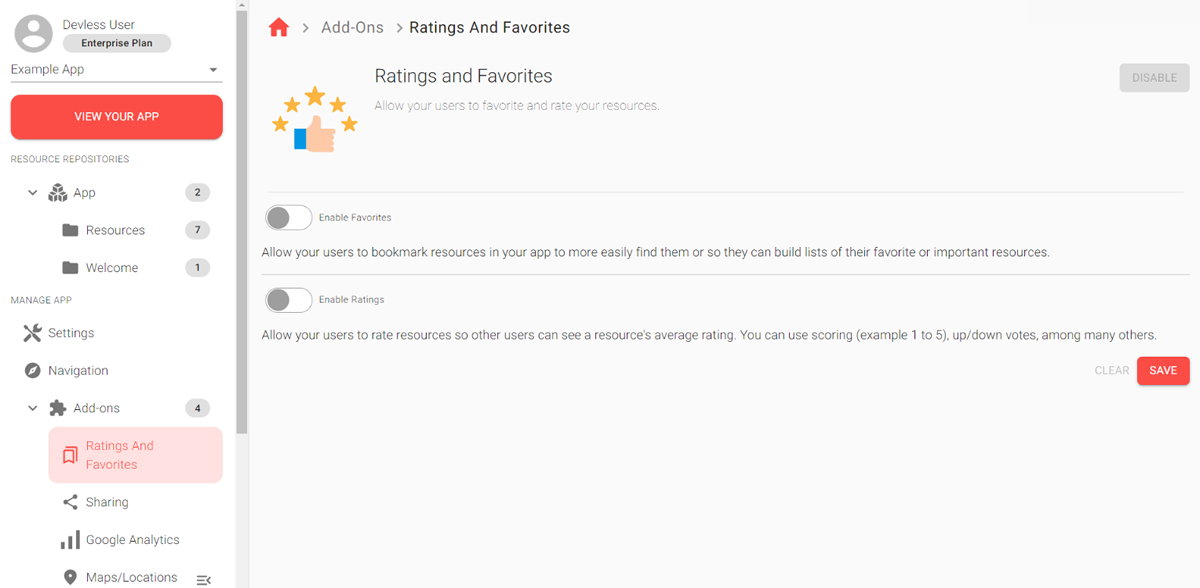
Configuring Your Devless App
Now that the add-on is enabled, we must configure your app with ‘Ratings & Favorites”. So let’s turn on these features, customize their settings, and create a Favorites list.
1. Toggle on features
First, navigate to the new settings page for ‘Ratings & Favorites.’ Here, you’ll have the option to turn on one or both features.
- Expand Add-ons in the left menu.
- Select the Ratings & Favorites page.
- Toggle on the features.
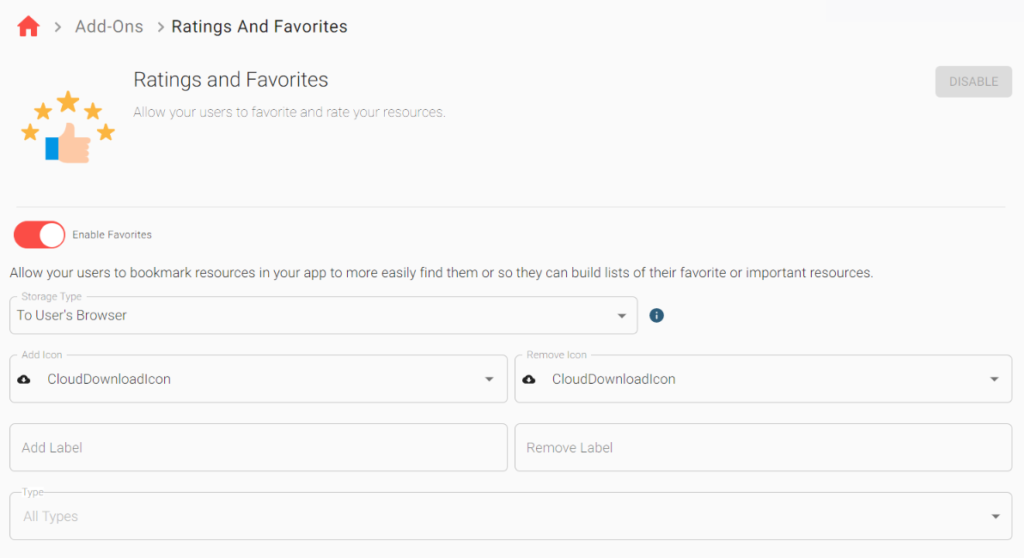
2. Customize settings
Once toggled on, the features expand with additional fields allowing customization. Here’s an explanation for each field to assist with your selections:
Favorites
- Storage Type:
- Save to User’s Browser – Favorites save to the user's browser. This feature works both with public and private apps. Conveniently, if a user is syncing their browser, it will work across devices.
- Save to User’s Profile – Favorites save to the app's database. This feature works only with private apps that require a login (the user has to create an account for favorites to save).
- Add Icon: Icon users click to add favorites.
- Remove Icon: Icon users click to remove favorites.
TIP: Stars and hearts are standard icons. For a quick search, type 'fav' for heart icons and 'star' for star icons.
![]()
- Add Label: This is a short description next to the ‘Add Icon.’ It can be left blank if you do not want a label, or you can enter text/symbols (+, -).
- Remove Label: This is a short description next to the ‘Remove Icon.’ It can be left blank if you do not want a label, or you can enter text/symbols (+, -).
- Type: The default allows all resource types, but you can select specific types to limit the resources users favorite within your app.
Ratings
- Scale: The type of rating system that will display in your app. (votes/range)
- Max Range: If the scale type is ‘Range,’ you can assign the range 1-10.
- Icon Set: If the scale ‘Type’ is ‘Range,’ you can assign star or smiley face icons.
- Type: The default allows all resource types, but you can select specific types to limit the resources users rate within your app.
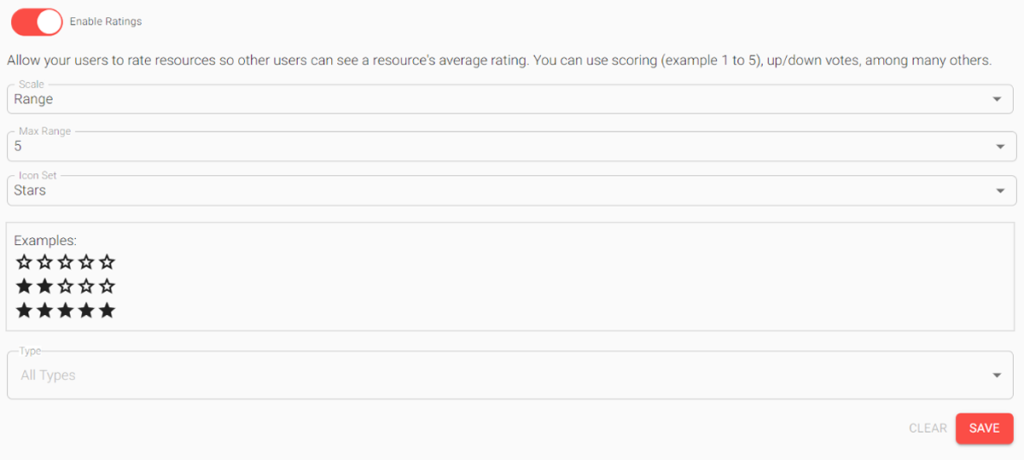
When finished customizing the settings, click SAVE at the bottom of the page.
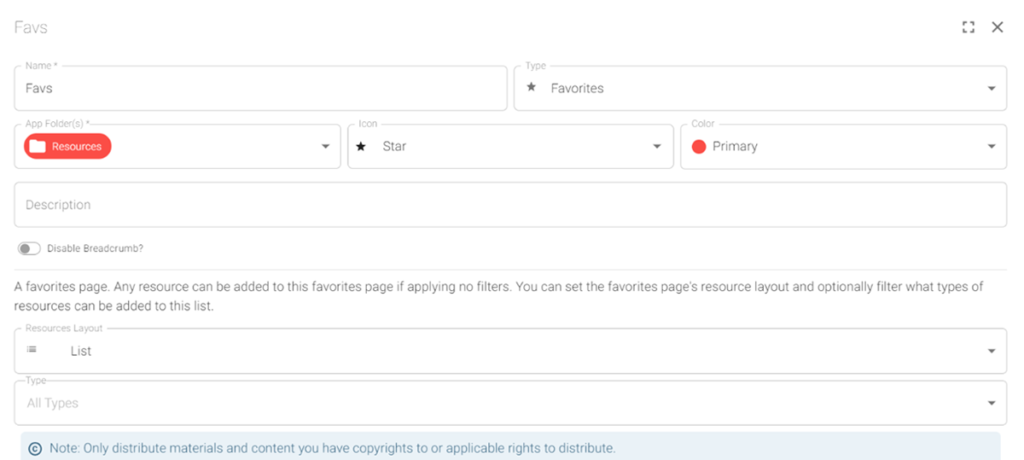
3. Create a 'Favorites' resource
After saving the settings above, add a ‘Favorites’ resource to your app. This allows any favorited resources to save into a personal collection (favorites list) for your app’s users.
- Go to “App” in the left menu.
- Click (+) at the bottom of the page to add “New Resource.”
- Complete the fields. Note: “Type” must be set to “Favorites,” plus the “Name” and “Icon” fields will display in the app.
- Click DONE to save.
Adding Favorites to Navigation
Click the plus (+) icon located at the bottom of the home page again and select 'New Resource'.
Great! Since you’ve created a ‘Favorites’ resource, users can now access their ‘Favorites’ by navigating to the folder you assigned in the previous step. However, if that folder is not visible to users or you'd like to follow best practices, providing users with a quick link via the app's hamburger menu or top/bottom app bars is necessary.
Here’s how to easily add ‘Favorites’ to navigation:
Add Favorites to Top App Bar
- Go to the Navigation page in the left menu.
- Under the Top App Bar section, click “+ ADD ITEM.”
- Select “Resource” as the Item Type, and type the name of the Favorites resource you created in step 3 above.
- Click ADD. You’ll see it added to the list of items in your menu. You can reorder items using the up/down arrows on the far right.
NOTE: Saving now would only add 'Favorites' to the app's hamburger menu. Skip to the last step to save if that's where you want it. - OPTIONAL: “Show Icon” by clicking the three vertical dots to the far right and selecting this option. This displays the icon along with the list’s name.
- OPTIONAL: “Add To Tabs” by clicking the three vertical dots to the far right and selecting this option. This displays favorites next to the hamburger menu instead of within it (see top-half of image below).
- Click SAVE at the bottom of the page.
In this example image, we included the icon and added it to a tab. When viewing a resource on a desktop, you see the ability to favorite or rate the resource directly below. On mobile, users access these features by tapping on a menu represented by three vertical dots.

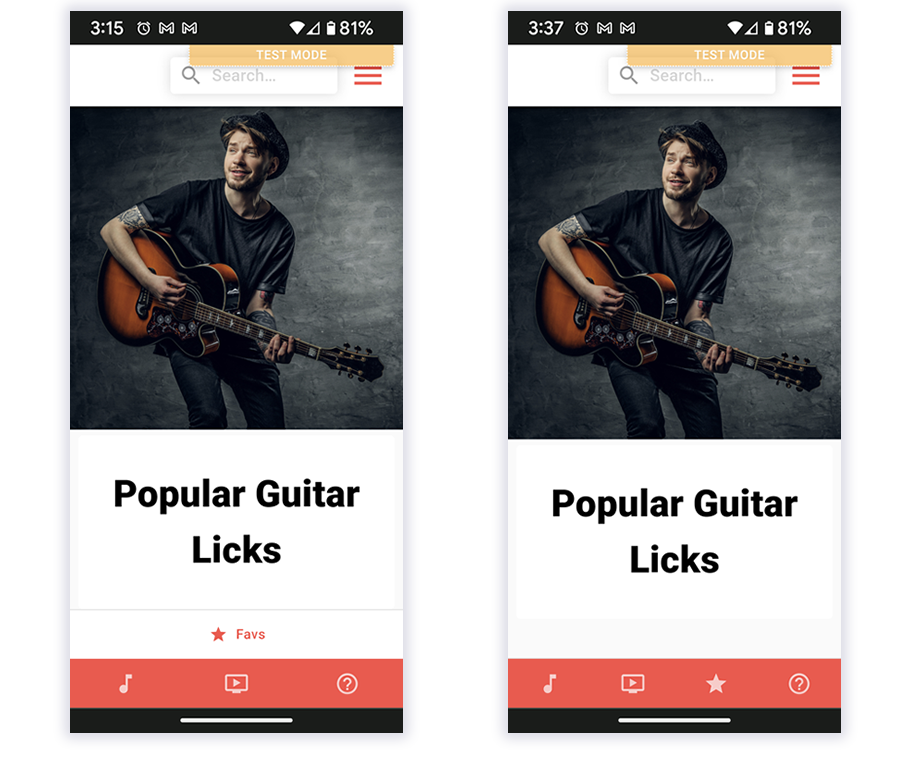
Add Favorites to Bottom App Bar
- Under the Bottom App Bar section, click “+ ADD ITEM.”
- Select “Resource” as the Item Type, and type the name of the Favorites Resource.
- Click ADD. You’ll see it added to the list of items in your menu. You can reorder items using the up/down arrows on the far right.
- OPTIONAL: “Show Icon” by clicking the three vertical dots to the far right and selecting this option. This displays the icon along with the list’s name.
- OPTIONAL: “Add To Tabs” by clicking the three vertical dots to the far right and selecting this option. This displays favorites in a tab at the bottom of the app’s screen.
NOTE: On a desktop, tabs display the name and icon. On mobile, tabs display only the icon if “Show Icon” is enabled in Step 4. Otherwise, it displays only the name. - Click SAVE at the bottom of the page.
Here’s an example on mobile that displays Favorites in the bottom app bar. On the left (first on mobile), it is not in a tab. On the right, it is. In both cases, the icon shows.
Testing the “Sharing” Feature
Congrats on setting up the ‘Ratings and Favorites’ add-on! Click 'VIEW YOUR APP' in Devless Admin to test your app’s new features. In the live app, open a resource to rate and favorite it at the top right. Then, locate the ‘Favorites’ list. The resource will be inside 🙂
Users will love what you’ve done, but don’t stop here! Check out our other cool add-ons you can implement, all without coding. Visit our Help Center, and we’ll be your guide.

Need Help Getting Started?
Blackburn Labs is a software engineering firm that specializes in Devless support because they built it! If you have questions or simply need support, please feel free to reach out to them